How to Fill Dings on Press Cylinders Using Epoxy Putty
Letterpress Cylinder Repair:
Our Vandercook Proof Letterpress 232P is almost a century old… Well, not that much. 80 years old? Something like that.
Well, over the decades, press operators (like us) have left hammers, quoin keys and who knows what on the press and let it run. So inevitably the press cylinder is not in a perfect pristine condition. It has dings and scratches.
We’ve been honing in on printing large prints using laser cut plates and we’ve come to a good place where we can simply use 4-plies of 1/4″ MDF as the type high plate material and run it w/o tympan on the cylinder.
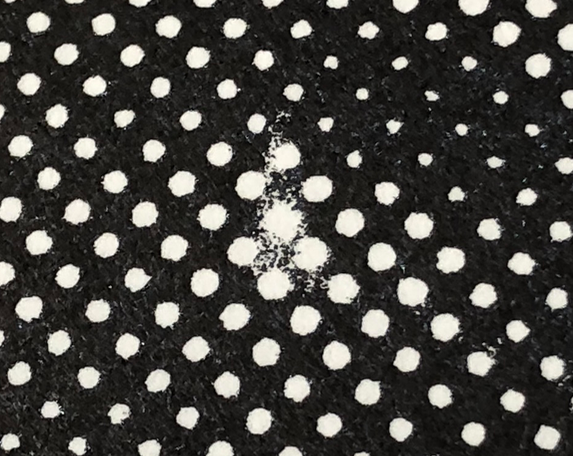
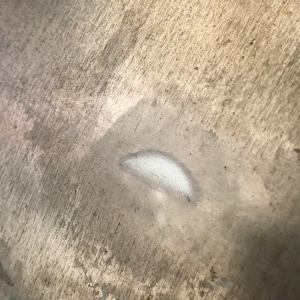
There came the problem, however, of these dings and imperfections of the cylinder really affecting the prints. Here is an example of the problem:
Thinking it was the issues with the plate itself, it took us hours to realize that the issue was with the cylinder.
Solution: Epoxy Putty Application (or spray-welding, which we have no way of doing ourselves)
Materials needed:
- Epoxy Putty Stick x 1
- Safety Razor Blade (glass cleaning razor blade) x 1
- Paint Thinner (or your usual roller wash)
- Acetone
- 600 Grit Sand Paper x 1 sheet
- Small MDF Block for Sand Paper (any machined smooth surface would do) x 2 x 2″ at whatever thickness
Preparation:
- Clean the affected areas of the press using paint thinner
- Wipe off the paint thinner residue with acetone
- Further attempt to clean the area with acetone of any residual remains of paint and debris
- Make hatch-marks inside the dinged surface using the razor blade corners
- Clean the surface once more with acetone and let it dry
- Start kneading a small amount of the epoxy putty. You can use the razor blade to portion.
Application:
- As soon as it is mixed well (colors are all merged), apply some into a ding, press hard and remove any excess. There should be more epoxy than the volume of the ding at this point but not boo much
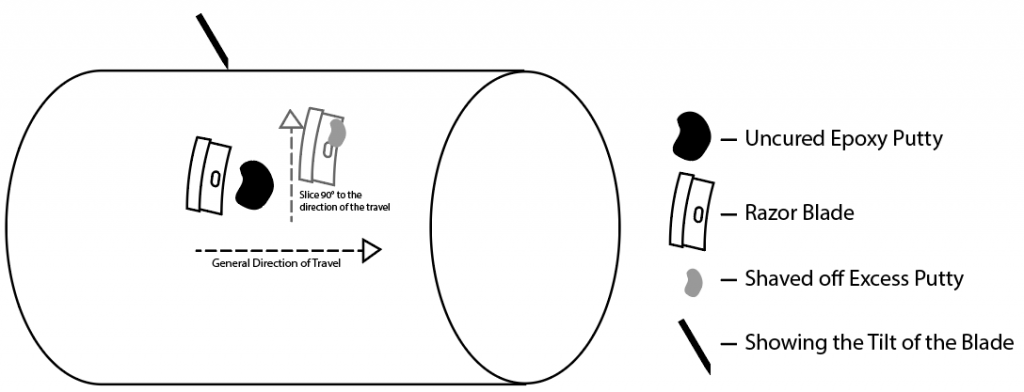
- Now the idea is now to shave off the still-soft-epoxy excess off the ding. The way to hold the razor blade is as following:
- hold the razor blade using both hands
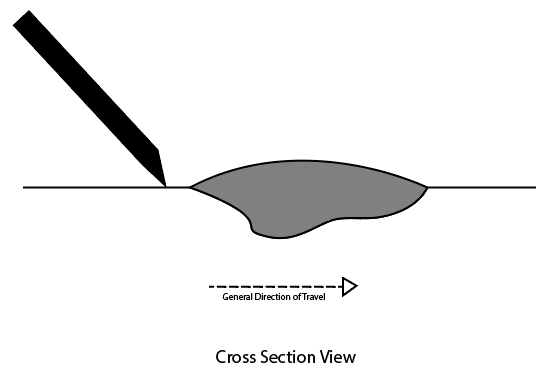
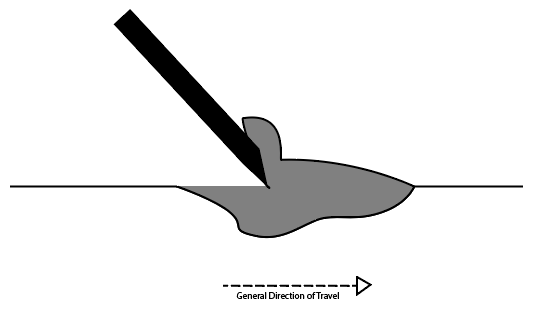
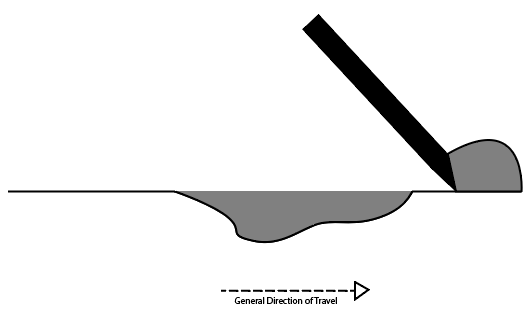
- Place the blade on the cylinder, away from the ding, now with soft epoxy, the top non-blade-side, slanted away from you, 30-40° tilt away from the perpendicular position.
- Press the blade firmly against the surface of the cylinder so that the sharp end of the blade curves and conforms to the curvature of the cylinder
- Pull the blade slowly (very slowly, about 1mm per second) towards the putty to shave any excess. Sometimes, if you make a slicing motion (so 90° from the direction of the general travel of the blade), it would help keep the putty surface smooth. There will be at least two points on the blade that will be resting on the cylinder at all times so it will shave off just the excess.
You can tell that the curing process has started to complete when the unused ball of putty is warmed up on its own and harder.
3. After the epoxy has cured, you can gently further smooth the surface with 600 grid sand paper wrapped around a smooth wood block.
That’s all.